6 Min Read

6 Min Read
POSTED 4. 2. 2024
Architectural shingles, also known as laminate or dimensional shingles, offer a durable, stylish, and versatile roofing solution for homes of all shapes and sizes. In this blog, we’ll take you through the step-by-step process of installing architectural shingles, covering everything from preparation and materials to installation techniques and safety tips. Whether you’re a seasoned DIY enthusiast or a first-time homeowner, we’re here to equip you with the knowledge and confidence to tackle this project like a pro. So, let’s dive in and discover how to install architectural shingles on your roof!
Inside this blog:
Keep reading to ensure you install architectural shingles the right way so you can give your home a proper roofing makeover!
Before diving into the installation process, it’s essential to gather all the necessary materials and tools. Here’s a quick checklist to ensure you’re ready to go:
Once you have everything you need, it’s time to prepare your roof for installation. Clear any debris, inspect the roof deck for damage, and ensure proper ventilation before proceeding.

Begin the installation process by carefully laying down a base layer of underlayment across the entire roof surface. This underlayment serves as an essential barrier, shielding your roof deck from moisture infiltration and providing added protection against the elements. Take care to secure the underlayment firmly in place using roofing nails or staples, ensuring proper overlap and coverage to create a watertight seal.
Once the underlayment is in place, it’s time to proceed with the installation of starter shingles along the eaves of the roof. These starter shingles play a crucial role in providing a solid foundation for the rest of the shingles and are instrumental in preventing wind uplift, especially in areas prone to strong winds.
If needed, trim the starter shingles to fit the dimensions of your roof accurately, ensuring a neat and uniform appearance across the entire eave line.
Pro Tip: Make sure to leave a small overhang at the eaves to allow for proper water drainage.
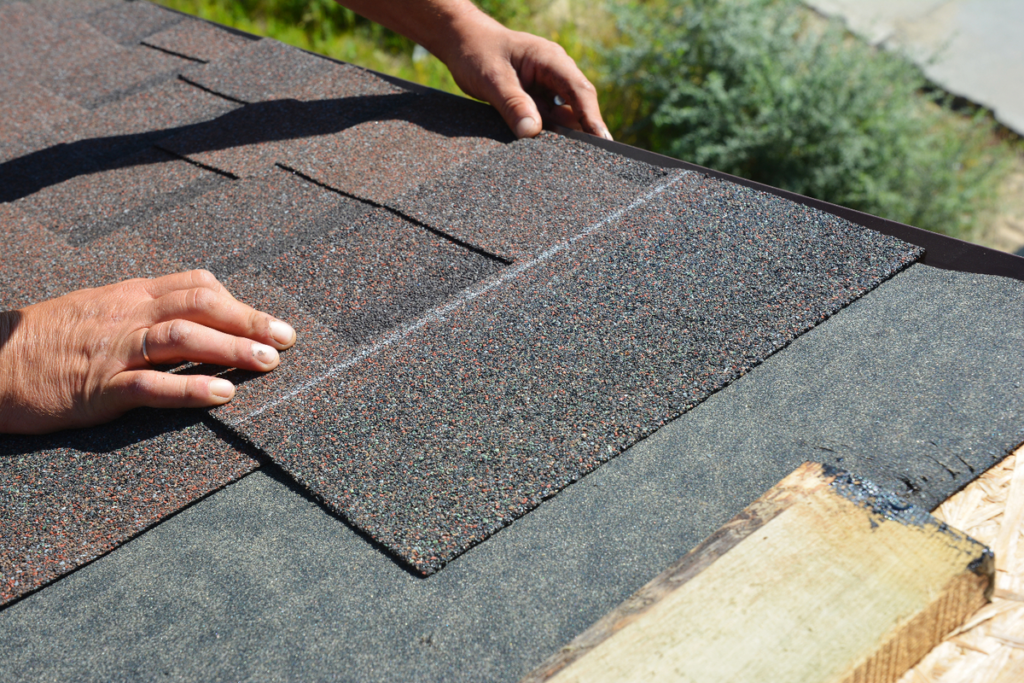
Installing roof shingles requires careful attention to safety and correct procedure. Begin at the bottom corner of the roof and work your way up and across in horizontal rows, staggering the joints between shingles to create a uniform, textured appearance.
As you progress, trim shingles as needed to fit around vents, chimneys, and other roof penetrations. Use a utility knife to make precise cuts, and seal any gaps or exposed nail heads with roofing cement to prevent water infiltration.
Once you’ve meticulously covered the entirety of your roof surface with architectural shingles, it marks the commencement of the final phase – adding those all-important finishing touches. This critical step not only serves to fortify the protective integrity of your roofing system but also contributes significantly to the visual appeal of your home’s exterior.
By dedicating attention to detail during this final installation phase, you can ensure that your architectural shingle roof not only delivers exceptional performance but also exudes timeless elegance and charm.

Once the installation of your new architectural roofing shingles is complete, it’s essential to conduct a thorough inspection to ensure everything is in place and functioning correctly. Addressing any issues promptly is crucial to prevent potential damage from escalating and compromising the integrity of your roof over time.
By proactively identifying and addressing any signs of wear or damage, you can mitigate the risk of more extensive and costly repairs to your asphalt shingle roof down the line. With consistent care and attention, your architectural shingle roof will continue to provide reliable protection and enhance the aesthetic appeal of your home for many years to come.
Installing architectural shingles is a rewarding endeavor that can enhance the durability, aesthetics, and value of your home. By following the step-by-step guide outlined above and paying attention to detail, you can achieve a professional-quality roof that provides lasting protection and curb appeal.
Remember to prioritize safety throughout the installation process and conduct regular maintenance to keep your roof in optimal condition for years to come. Whether you’re tackling the project yourself or hiring a professional contractor, architectural shingles offer a versatile and attractive roofing solution for homeowners looking to upgrade their homes. So, get ready to elevate your home’s style and functionality with the timeless appeal of architectural shingles!
Contact our team of expert roofers at Kingfisher Roofing for top-of-the-line craftsmanship and a customer-centric approach to all roofing projects. We can’t wait to hear your questions and ideas about the roof that protects your property. Let’s get started on your roof today!